You Don’t Need a Butcher Block Countertop to Build a Thick Wood Desk

Back-to-school desk setups often require a wide work surface without the cost of a solid butcher block countertop. Homedit DIYer Brittney Smart created the thick wood top for this desk from two ready-made project panels, stacking them instead of starting with one heavy slab.

Each panel measures 2 by 4 feet and 3/4 inch thick. Glued together, they create a 1 1/2-inch desktop with the substantial edge of butcher block. Mint hairpin legs complete the base without adding an apron, drawers, or a bulky frame beneath the study space.
Project Panels Start With the Right Desk Dimensions

Ready-made wood panel already measures 2 by 4 feet, providing enough depth for notebooks and a laptop while keeping the desk at a compact four-foot width.
Narrow boards joined across the panel create visible changes in grain, knots, and tone. Instead of cutting and joining individual boards to build a desktop, the laminated panel provides that surface in one piece.
Wood Glue Joins Two Panels Across the Full Surface

Smart spreads wood glue across the back of one panel in long passes that reach through the center as well as the perimeter. Second panel will cover the entire glued face rather than serving as a narrow reinforcement around the edge.
Using a second full panel changes more than the appearance. The added layer gives screws for the legs more wood to bite into and creates a thicker structure across the complete desk surface.
Stacking the Panels Creates the Thick Wood Edge

Second project panel drops onto the first with the edges lined up on all four sides. Two 3/4-inch pieces now form a top about 1 1/2 inches thick.
That stacked construction creates the feature that makes the desk look as if it began with a much heavier piece of wood. There is no thin core hidden behind a thick edge strip; the full surface has the same doubled depth.
Clamps Hold the Two Layers as One Top

Clamps grip all four corners while the glue cures, keeping one panel from sliding past the other. Edge alignment matters because nothing will cover the sides once the desk is finished.
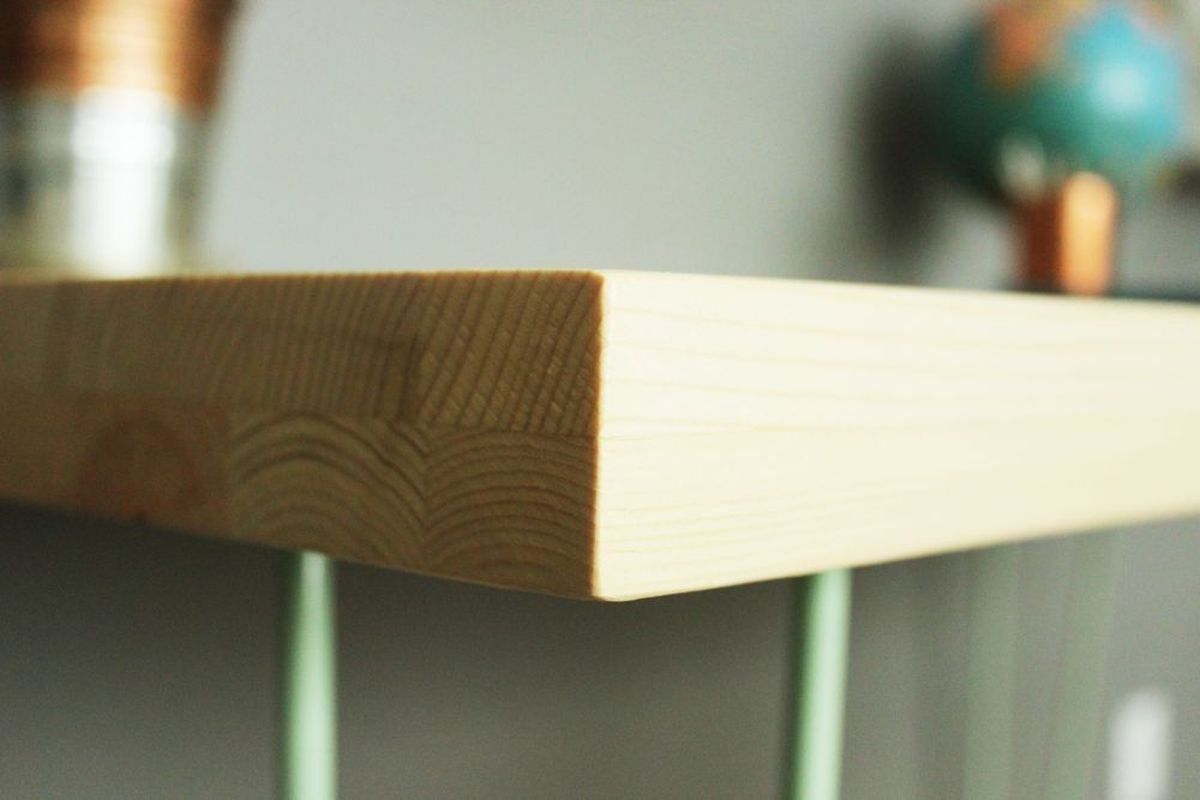
Close view already shows the new proportions. The doubled edge has enough depth to stand against the narrow hairpin legs that will support it.
Hidden Screws Add Support From Below

Predrilled holes and screws reinforce the connection between the two project panels. Smart marks points across the underside instead of placing fasteners through the finished face.
Screw depth stops short of the top surface. Once the desk is flipped over, the hardware joining the panels stays out of sight and the upper face remains clear for schoolwork.
Sanding and Clear Finish Complete the Wood Top

Orbital sanding smooths the top and evens out small differences where the two panels meet. Smart starts with 120-grit sandpaper, moves to 220 grit, then removes the remaining dust before applying the finish.
Water-based polycrylic seals the wood without covering its grain, knots, or shifts in tone. Three coats create a protected work surface, with light sanding between coats to keep the desktop smooth for books, paper, and a computer.
Hairpin Legs Screw Straight Into the Wood

Hairpin legs mount near each corner with flat steel plates and four screws. Thickened desktop provides enough material for the fasteners without requiring a separate wood frame beneath it.
Each leg bends into a long narrow loop, leaving far less material under the desk than square wood legs and connecting rails would require. Chair space stays open across most of the front.
Mint Legs Put Color Under the Natural Wood

Flipped upright, the desk pairs pale wood with mint-painted metal. Thin legs almost disappear against the wall compared with the thick rectangular top above them.
That contrast keeps a four-foot desk from looking heavy in a bedroom or student workspace. Color sits below the work surface rather than covering the wood itself.
Four Feet of Width Leaves Room for Schoolwork

Finished top provides a broad uninterrupted surface with no shelves or drawers cutting into the work area. A plant and globe can stay against the wall while the front and center remain open for books, paper, and a laptop.
Two-foot depth also gives the desk room for supplies behind the main work zone. Everything sits on one level, making the full panel available when larger projects need more space.
Thick Edge Carries the Butcher Block Look

Corner close-up exposes the feature created by stacking the panels. End grain shows the depth of the top, while the long side presents a broad wood edge above the slim metal legs.
From standing height, the seam between the two layers draws far less attention than the overall thickness. What reads first is a substantial wood desktop rather than the pair of thinner panels used to make it.
Open Base Leaves More Room Under the Desk

Hairpin legs occupy the four corners without adding crossbars, side panels, or a front apron. Chair can move across the center, and knees do not meet a horizontal rail beneath the desktop.
For a back-to-school setup in a bedroom, that open structure also keeps the desk from becoming a large block of furniture against the wall. Most of its volume stays concentrated in the wood top.
Two Project Panels Replace the Butcher Block Slab

Side-by-side view reveals the construction behind the finished desk. What looks like a thick wood work surface starts with a standard project panel, then gains its depth from an identical panel attached underneath.
For a school desk, the approach puts the money and work into the part that gets used most: a wide, solid work surface. Four hairpin legs handle the base, leaving the 2-by-4-foot top open for homework, drawing, and a computer.